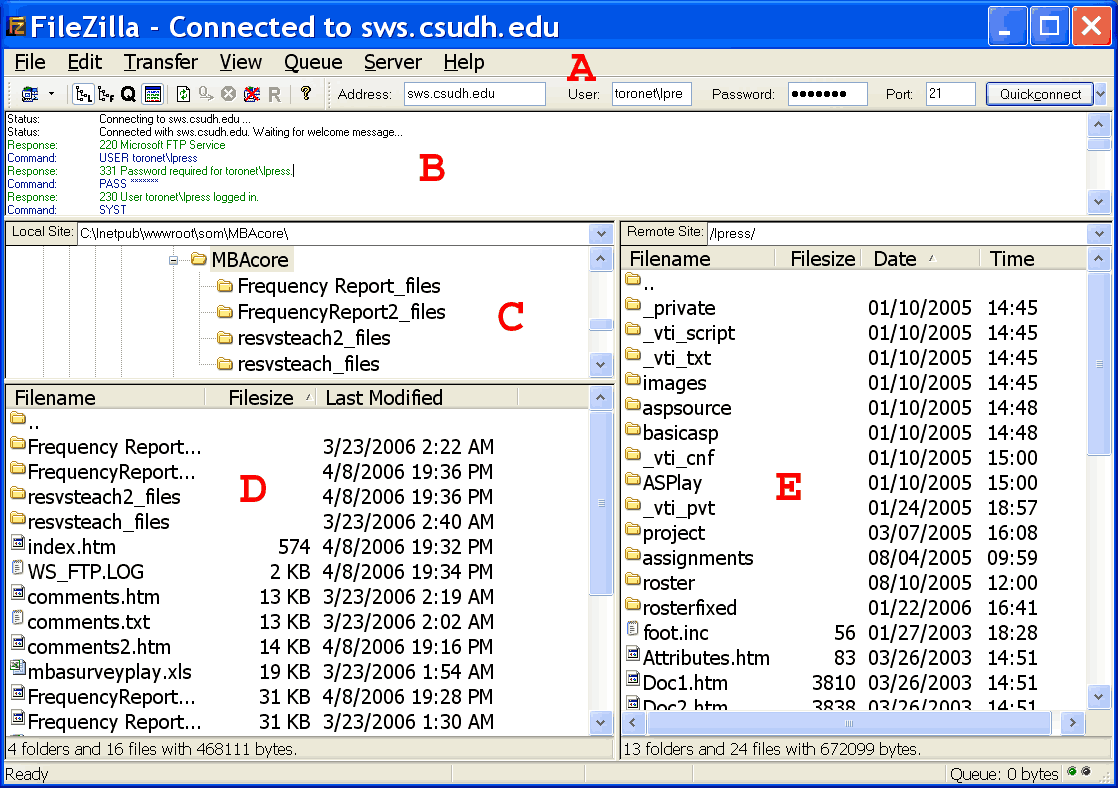
As you see in the users guide, the FileZilla screen is broken into five areas:

A: To start an FTP session, enter the server domain name, user name and password here. (Leave the port at the default value of 21). When you click quick connect an FTP session will be established. Do not forget that the user name must be preceded by toronet and a slash (\ or /). (Mine is toronet\lpress).
B: Here you can see the FTP protocol in action. The commands the FTP client sends to the server and its replies are listed here. Once you have looked these over -- try to figure out what each of the commands does -- you can close this pane to save screen space.
C: A tree view of the directories on your local client machine.
D: Listing of the currently selected directory on the client.
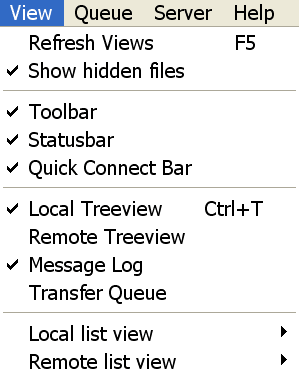
E: Listing of the currently selected directory on the server. (You can also see a tree view with the command View > Remote Treeview).
Note that you can adjust the boundaries between these areas by dragging them.
You can hide or display these areas using the View menu if you wish to have a different screen layout:

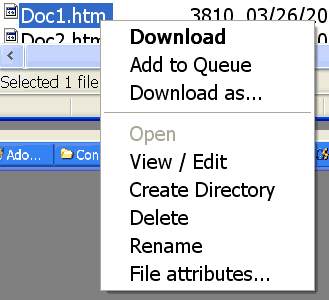
By right clicking on a file name, you can rename it, edit it, etc.:

Note that to display/edit files, you must configure FileZilla, selecting a text editor to use.